Electron – Angular 4 on Desktop
Introduction
Electron is a framework for building cross-platform desktop applications using web technologies using Chromium and Node JS. In this tutorial we will turn an Angular 4 web application into a desktop application.
Installation
First you need to install Electron using NPM.
npm install -g electron
Of course you will need an Angular 4 application. You can generate a new application now but in this tutorial I will use the source codes from previous blog posts. Now add a new file in the root directory, I will call this electron.js then add write these code.
const { app, BrowserWindow } = require('electron');
const path = require('path');
const url = require('url');

// Keep a global reference of the window object, if you don't, the window will
// be closed automatically when the JavaScript object is garbage collected.
let win;

function createWindow() {
    // Create the browser window.
    win = new BrowserWindow();

    // and load the index.html of the app.
    win.loadURL(url.format({
        pathname: path.join(__dirname, 'dist/index.html'),
        protocol: 'file:',
        slashes: true
    }));

    // Open the DevTools.
    win.webContents.openDevTools();

    // Emitted when the window is closed.
    win.on('closed', () => {
        // Dereference the window object, usually you would store windows
        // in an array if your app supports multi windows, this is the time
        // when you should delete the corresponding element.
        win = null;
    });
}

// This method will be called when Electron has finished
// initialization and is ready to create browser windows.
// Some APIs can only be used after this event occurs.
app.on('ready', createWindow);

// Quit when all windows are closed.
app.on('window-all-closed', () => {
    // On macOS it is common for applications and their menu bar
    // to stay active until the user quits explicitly with Cmd + Q
    if (process.platform !== 'darwin') {
        app.quit();
    }
});

app.on('activate', () => {
    // On macOS it's common to re-create a window in the app when the
    // dock icon is clicked and there are no other windows open.
    if (win === null) {
        createWindow();
    }
});

// In this file you can include the rest of your app's specific main process
// code. You can also put them in separate files and require them here.
These codes are taken from the Electron’s Quick Start webpage – https://electronjs.org/docs/tutorial/quick-start. Take a look at the highlighted line of codes. It looks for an index.html in the dist folder and load it on the screen.
Relative Paths
Open src/index.html and update <base href="/"> to <base href="./">. This update is required so electron will be able to locate the files.
<!doctype html>
<html lang="en">

<head>
    <meta charset="utf-8">
    <title>ContentChildren</title>
    <base href="./">

    <meta name="viewport"
          content="width=device-width, initial-scale=1">
    <link rel="icon"
          type="image/x-icon"
          href="favicon.ico">
</head>

<body>
    <app-root></app-root>
</body>

</html>
Now that we have updated the Angular 4 base href we need to use relative path whenever we refer to files like images like so <img src="assets/{{ book.imageSrc }}">. I tried to refer the images using <img src="/assets/{{ book.imageSrc }}"> and it did not work.
Try running the application using the following command.
ng build
electron electron.js
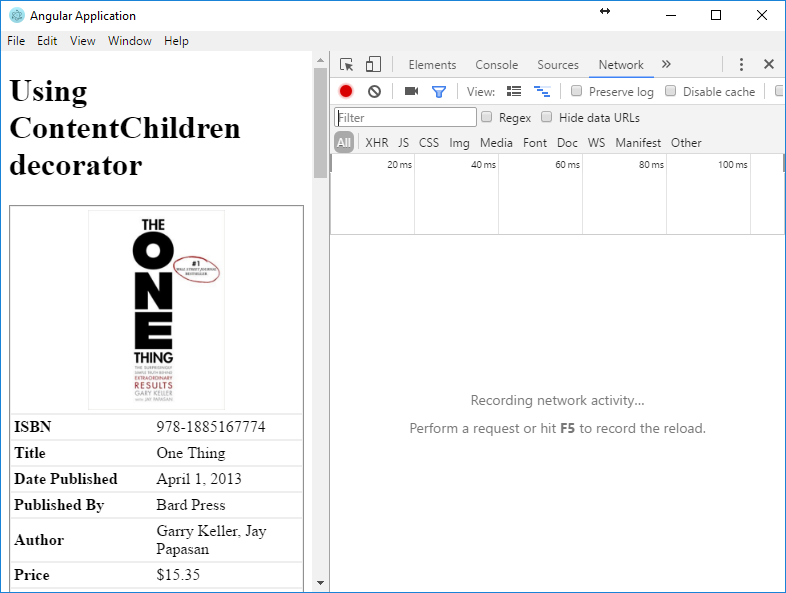
You need to build the application using Angular CLI before running it with electron after that you should see something like this.
Comment out win.webContents.openDevTools(); in electron.js file to hide the chrome developer tools.
