Laravel API and Angular Client Tutorial – Part 6 Client Form File Upload
Introduction
In this tutorial we will update the Angular Client app to and create a form to upload a file to our Laravel API. We will use the Angular reactive forms for validation. Lastly, we will create an Angular guard to make the post form only accessible to logged-in users.
Create Post Component
To generate a new component run this command.
ng generate component components/post/post-create --flat --skip-tests --inline-style
This will create the component files in the components/post directory i.e.
src/app/components/post/post-create.component.htmlsrc/app/components/post/post-create.component.ts
We can now use this component to create a new route.
src\app\app-routing.module.ts
const routes: Routes = [
  { path: '', component: HomeComponent, },
  { path: 'oauth/callback', component: AuthComponent },
  { path: 'post', component: PostCreateComponent, canActivate: [PostGuardGuard] },
];
To navigate to the new page, you have to update the page navigation bar link if have not already.
src\app\app.component.html
<nav class="navbar navbar-expand-md navbar-dark bg-dark fixed-top">
    <a class="navbar-brand"
       href="#">Photo & Video Sharing App</a>
    <button class="navbar-toggler"
            type="button"
            data-toggle="collapse"
            data-target="#navbarsExampleDefault"
            aria-controls="navbarsExampleDefault"
            aria-expanded="false"
            aria-label="Toggle navigation">
        <span class="navbar-toggler-icon"></span>
    </button>
    <div class="collapse navbar-collapse"
         id="navbarsExampleDefault">
        <ul class="navbar-nav mr-auto">
            <li class="nav-item active">
                <a class="nav-link"
                   routerLink="/">Home <span class="sr-only">(current)</span></a>
            </li>
        </ul>
        <ul class="navbar-nav">
            <li class="nav-item"
                *ngIf="isAuthenticated">
                <a class="nav-link"
                   routerLink="post">Post</a>
            </li>
            // ommitted
        </ul>
    </div>
</nav>
<main role="main"
      class="container">
    <router-outlet></router-outlet>
</main>
Creating the Form
First we have to create a FormGroup instance. This object will automatically validate the values entered and have properties that we can use to show feedback to user. You can read more about it here.
src\app\components\post\post-create.component.ts
export class PostCreateComponent implements OnInit {

    public formGroup: FormGroup;

    constructor(
        private formBuilder: FormBuilder
    ) {
    }

    ngOnInit() {
        this.formGroup = this.formBuilder.group({
            title: this.formBuilder.control('', [Validators.required]),
            file: this.formBuilder.control('', [Validators.required]),
        });
    }

}
In this code, we first inject a class called FormBuilder. This will create the FormGroup instance for us. We then created the FormGroup inside ngOnInit method.
src\app\components\post\post-create.component.html
<div class="row">
    <div class="col-md-6 offset-md-3">
        <form [formGroup]="formGroup"
              novalidate>
            <div class="form-group">
                <label for="title">Title</label>
                <input type="text"
                       class="form-control"
                       [ngClass]="{ 'is-invalid' : formGroup.get('title').invalid && (formGroup.get('title').touched || formGroup.get('title').submitted) }"
                       id="title"
                       formControlName="title">
            </div>
            <div class="custom-file mb-3">
                <input type="file"
                       class="custom-file-input"
                       [ngClass]="{ 'is-invalid' : formGroup.get('file').invalid && (formGroup.get('file').touched || formGroup.get('file').submitted) }"
                       id="file"
                       formControlName="file">
                <label class="custom-file-label"
                       for="file"></label>
            </div>
            <button class="btn btn-primary"
                    type="submit">Post</button>
        </form>
    </div>
</div>
In the form tag we set the formGroup attribute to formGroup which we instantiated in the component. Second, we set the formControlName for each fields.
To get the a field in a FormGroup we can call the get method e.g. formGroup.get("title"). From these fields, we can get the touched or submitted flags and there are other ones as well.
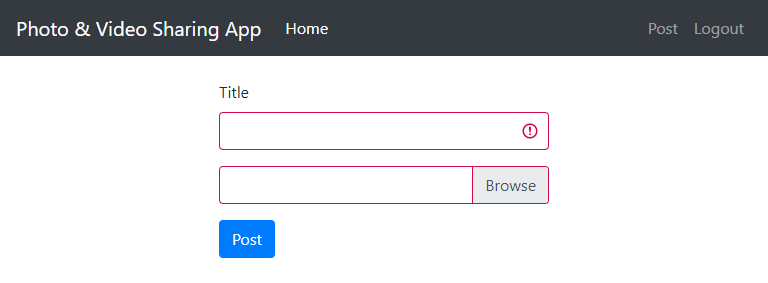
From these features we set the is-invalid HTML class to show the field is red which is available in bootstrap.
In the screenshot above the fields shows in red if you click or touch on them and not enter a value.
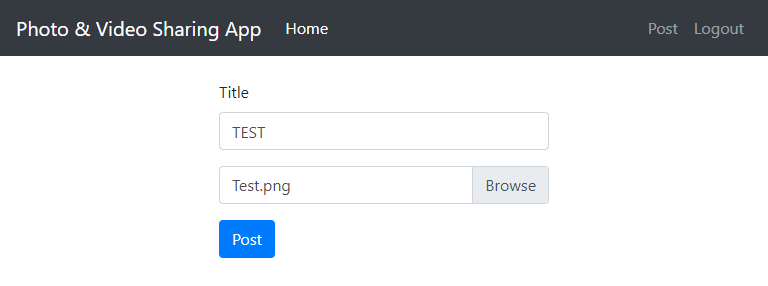
Next, we have to update the file field to display the filename when you select one. We also need to store the file was selected.
For this we need to have a properties to hold these values and update them via an event.
src\app\components\post\post-create.component.ts
export class PostCreateComponent implements OnInit {

    // omitted
    public fileName = 'Choose file...';
    public file: any = null;

    // omitted

    onFileSelect(e) {
        this.fileName = e.target.files[0].name;
        this.file = e.target.files[0];
    }
}
src\app\components\post\post-create.component.html
// omitted
<div class="custom-file mb-3">
    <input type="file"
           class="custom-file-input"
           [ngClass]="{ 'is-invalid' : formGroup.get('file').invalid && (formGroup.get('file').touched || formGroup.get('file').submitted) }"
           id="file"
           formControlName="file"
           (change)="onFileSelect($event)">
    <label class="custom-file-label"
           for="file">{{ fileName }}</label>
</div>
//omitted
In the codes above we set the (change) event of the file input and change the label accordingly. We also store the file in a property for later use when we actually upload the file.
Now we want the form to show the validation when we just click the “Post” button. To do this we can force the formGroup to mark all fields as touched.
src\app\components\post\post-create.component.ts
export class PostCreateComponent implements OnInit {

    // omitted

    submit() {
        this.formGroup.markAllAsTouched();
        if (this.formGroup.invalid) {
            return;
        }
    }

    // omitted
}
In the above code we mark the fields as touched and check the form if it is invalid.
src\app\components\post\post-create.component.html
<div class="row">
    <div class="col-md-6 offset-md-3">
        <form [formGroup]="formGroup"
              (ngSubmit)="submit()"
              novalidate>
            <div class="form-group">
                <label for="title">Title</label>
                <input type="text"
                       class="form-control"
                       [ngClass]="{ 'is-invalid' : formGroup.get('title').invalid && (formGroup.get('title').touched || formGroup.get('title').submitted) }"
                       id="title"
                       formControlName="title">
            </div>
            <div class="custom-file mb-3">
                <input type="file"
                       class="custom-file-input"
                       [ngClass]="{ 'is-invalid' : formGroup.get('file').invalid && (formGroup.get('file').touched || formGroup.get('file').submitted) }"
                       id="file"
                       formControlName="file"
                       (change)="onFileSelect($event)">
                <label class="custom-file-label"
                       for="file">{{ fileName }}</label>
            </div>
            <button class="btn btn-primary"
                    type="submit">Post</button>
        </form>
    </div>
</div>
We call the submit method when the form is submitted.
Uploading the file
First we need to add the method to upload the file via AJAX to PostService class.
export class PostService {

  // omitted

  post(title: string, file: any) {

    const form = new FormData();
    form.append('title', title);
    form.append('file', file);

    return this.http.post(environment.apiUrl + '/posts', form);
  }
}
The code is pretty simple. We use FormData since we can’t use JSON to upload the file, the we just post to our API.
Next is we inject the PostService to our component then update the submit method.
export class PostCreateComponent implements OnInit {

  constructor(
    private formBuilder: FormBuilder,
    private postService: PostService
  ) {
  }

  // omitted

  submit() {
    this.formGroup.markAllAsTouched();
    if (this.formGroup.invalid) {
      return;
    }

    this.postService.post(
      this.formGroup.get('title').value,
      this.file
    ).subscribe(() => {

      this.formGroup.reset();
      this.file = null;
      this.fileName = 'Choose file...';
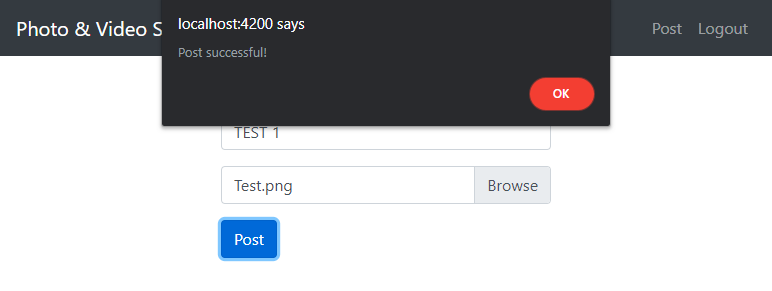
      alert('Post successful!');

    });
  }

}
In the codes above, we simply subscribe to the post method of the PostService and clear the fields after finishing.
Testing it out
That is it for now. Thanks for reading!
References
- Tutorial Source Codes –
node_modulesdirectory is not included so please runnpm install. - Part 1 API Authentication
- Part 2 Client OAuth Login
- Part 3 API Get Photos and Videos
- Part 4 Client Get Photos and Videos
- Part 5 API File Upload
- https://angular.io/guide/reactive-forms


